Hers.
With a new pantry (check that out here if you haven’t seen it yet), comes the chance to do one of my favorite tasks. Let’s say it together: re-org-a-nize. Ah, the thought brings joy to my heart.
Have I mentioned that I L-O-V-E Pinterest? Hm, thought so. Well, I picked up this great storage idea from The Painted Hive which not only looked great but it was relatively inexpensive to replicate.
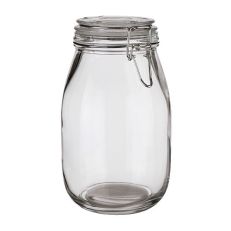
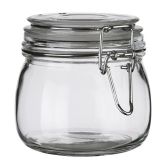
I followed her advice and picked up a few SLOM jars from IKEA: one 17 oz, two 34 oz, two 61 oz, and one bottle with stopper for a grand total of $24 pre-tax. Not too shabby.
The Painted Hive’s guide involves using magic decal coating paper which she sources from an Australian company and it was a little pricey (try $14.90 for three sheets)… yikes! It sounds like a great material but we weren’t ready to invest in the jars for that much just yet. We decided to use regular clear sticker paper instead and just kept in mind that we wouldn’t be able to run the jars through the dishwasher as the ink would probably come off. I’m pretty much a hand washing pro though, so I wasn’t too phased.
We found Avery clear, decal paper for $13.60. For 10 number of sheets, the price wasn’t too bad and now I have a supply of sticker paper on-hand for the next random project that arises (with Pinterest, I’m sure it won’t be too long).
What I liked best about The Painted Hive’s tutorial was the label design she created. I wanted to create a few additional food item labels and use a slightly different font (more of a typewriter look), so I decided to create my own labels.
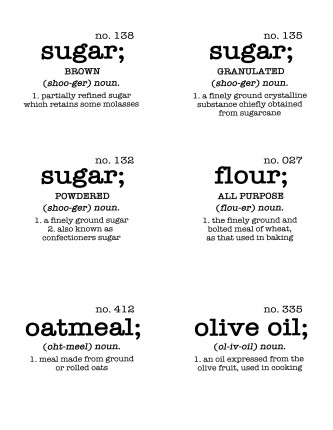
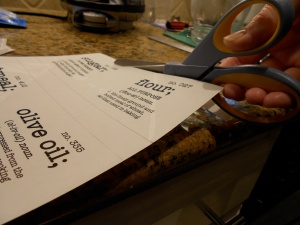
Based on food we store, I decided to recreate The Painted Hive’s brown sugar and flour labels, create slightly altered powdered sugar and granulated sugar labels, and then created new labels for oatmeal and olive oil. Feel free to download the PDF of the labels below for your own food storage jars! Download here.
And guess who I suckered in to applying the stickers? 🙂
His.
Alright, I don’t know what it is about women, but they’re obsessed with storage. I don’t just mean a place to store things, but I mean how everything has to be cute and stylish in some way. It’s not enough to put something in a box or on a shelf behind a door; no, everything has to have some clever storage solution, and quite honestly it drives me nuts.
So I catch Julie fawning over something on Pinterest and foolishly asked, “What’s that?” I hardly blinked before Julie threw my keys at me and shouted that we were going to IKEA. Um, OK, but she refused to tell me what for (which is a sure sign that it’s something that will require a lot of work… on my part). We finally get about halfway through the “Help Yourself” section (or whatever it’s called) when Julie points off in the distance and yells, “JARS!” At this point, I was a bit confused, as I had jars at home. No, apparently these were special jars. They had a few different kinds which were all either $4 or $6. Initially, Julie picked out all $6 jars, but I convinced her to pick a few of the $4 variety, including a bottle I promised would hold olive oil (an idea that made her eyes light up almost as brightly as the day I proposed).
We then scurried off to Office Depot in search of a transparent adhesive paper to make the labels, but all we could find was translucent, which gave the labels a “frosted” look which was decent, but not quite what we were looking for (which I like to think is an antique chemistry lab look, but is probably not the case).
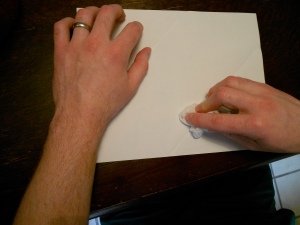
As I applied the labels, I noticed that the moisture from my skin made the “frosting” rub off the paper… which gave me an idea. I grabbed a clean sheet and a damp paper towel, and buffed away like I was giving suede shoes a mirror finish. After about 20 minutes of carefully wiping the “frosting” off, I had what looked like a sheet of packing tape.
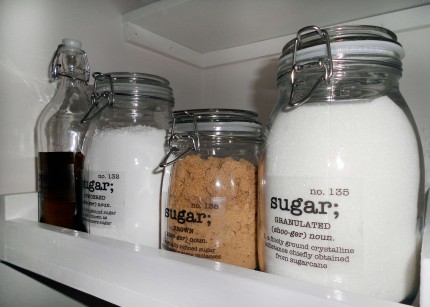
The bottom sugar label is the frosted look and the top sugar label is after my buffing work.

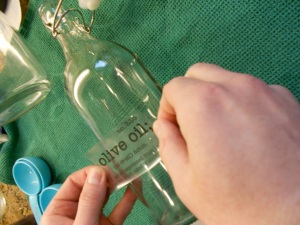
And here’s a shot to show the frosted paper versus unfrosted after applied on the jars.
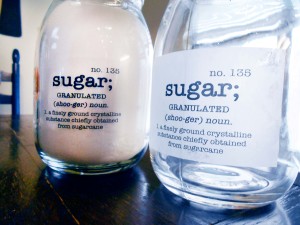
Julie printed and cut another set of labels, and we finally achieved the look we were going for. I was paranoid about the ink rubbing off such a high-sheen surface, so I only handled the labels by the very outer edges, and we used Q-tips to push the air bubbles out.
I just never realized how much sugar we have in this house.
After.
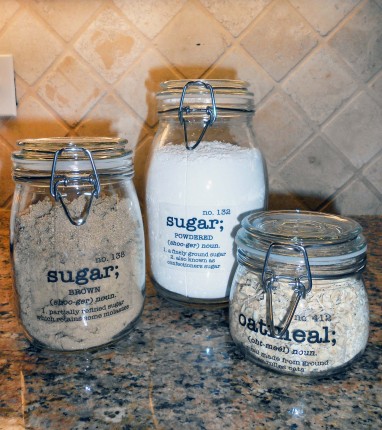
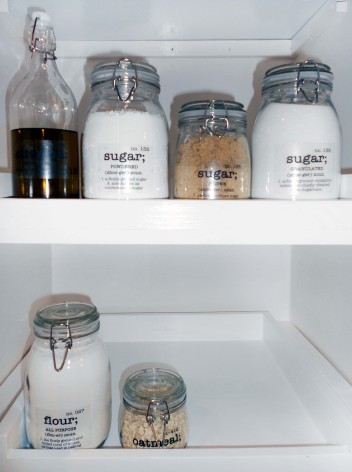
Here’s the final line-up.
And a close up of our beautiful new food storage solution.
And here they are in our stunning new pantry.
I think I may have a new label fetish. Hmm… need to find more things to make Chris label stat.





Hi! Thanks so much for letting me know about your project. The labels look awesome! It’s funny cause looking at your pictures makes me think I’m looking in my own pantry 🙂
It’s so cool seeing everyone’s variations on the process. There are so many different options for paper/decals out there.
Kristine
Glad you like it, Kristine! Thank YOU for the awesome inspiration!
Great project! Did the ink on the labels eventually dry, or are they still vulnerable to smudging?
Nope! No smudging! I waited a few minutes after Chris applied the labels and went over the lettering with a Q tip to work out the air bubbles. At that point, they had 15 minutes of dry time so I recommend waiting at least that long before touching the ink.
Great! I happen to have some of these labels already so I’m definitely going to try this! Thanks again!
Good luck, Lily! I wouldn’t recommend getting them wet though. I haven’t tested for water smudging yet.
This may or may not be a dumb question, but are the numbers connected to anything, or just random for looks?
Great question, Holly. My husband, Chris, asked exactly the same thing and then simply shook his head as I replied, “Nope, they just look cool.” 🙂
Love the thrifty tip on decal alternatives. I just printed your labels (thanks!) and was wondering what font you used (just in case I need to make some for other food items).
Hi Donna,
So glad you’re able to use these labels! The font I used is called American Typewriter. If you don’t have it on your machine already, here’s a link to where you can download it for free: http://www.ufonts.com/fonts/american-typewriter.html.
-Julie
Will downloading the font from this site add any annoying programs? I tried from another site, and it took me two days to clean computer. Yikees
Linda- it didn’t download any additional software on my Mac when I originally got it so you should be okay. That can definitely be annoying!
-Julie
UFonts still offers American Typewriter as a free download, but I have not found a way to download without signing up for a membership? Not sure if I should sign up or not. A bit concerned this will lead to unwelcome downloads attaching themselves to my computer.
What font did you use for these?
Hi Anni,
The font is called American Typewriter. I posted a link in the comment above where you can download it, if it’s not already on your computer.
-Julie
Thank you so much! I will be making these this weekend 🙂 You guys rock!
You are so welcome! Have fun! It’s such a quick project but makes a big statement.
-Julie
I tried making these and unfortunately ran into the same “frosting” issue. How exactly did you get rid of it? Do you use the damp towel for buffering?
I used a damp paper towel to literally buff the frosted finish off, leaving a clear gloss sheet. It’s a bit like polishing an old piece of metal.
-Chris
Perfect, thanks so much!
I bought the same Avery “clear” stickers and had to do the Buffing to get transparent. Having a hard time getting the ink to dry… Been a few hours. Did you guys have to do anything special to get the ink to set? Thanks!! 🙂
Hi Melody,
Try using a hair dryer to speed up drying time. Once we did that, it didn’t take too long to dry. Good luck!
-Julie
Hi
I sell the waterslide inkjet decal paper and I will be getting the magic coating paper mentioned in The Painted Hive blog within a week. It is the same paper that is sold in Australia. If you are interested you can email me at robinseggs@comcast.net
Thanks
Robin
Can I ask which software you used to create the labels? And what font did you use for the italics?
Hi Dan,
I used Photoshop to create the labels. The font I used for all the copy was American Typewriter, including the italicized part. Amazing how different one font can look in different ways, huh? Hope this helps!
-Julie
I am so glad I found your page as I was becoming frustrated with the “clear” avery labels to the point avery was about to hear me rawr! (I went through 2 packs of their labels even the so called “see through ones”. After you buffed out the labels and printed, how long did it apx take for your ink to dry? I am scared to smudge!
We didn’t wait that long, maybe 30 minutes at most. We used a laser printer, not an inkjet. If you use an inkjet, you may want to wait a little longer for the ink to dry.
-Julie
Hi,
Love the post. Been wanting to do this for soooo long with our clear drinking and beer glasses. Is the Avery product you used dishwasher safe?
Brittany
I’m not sure that it is, Brittany. I always carefully hand wash mine just to be safe. Good luck with your project- that’s a good gift idea, customizing beer glasses!
-Julie
I thank you. Have u found a place were u can select the labels u want to print? I have some others that aren’t common. Also would a coat of Mod Poge seal the ink?
Thanks for the label tips but has anyone ever considered spraying a little holding hairspray after you have printed them? It should help. Read on Pinterest when I was printing some wedding invitations to keep ink from running (laser printer) and used that same solution when I had to iron on lettering on a sewing project. Also helps ink set on clothing labels using permenant markers. Ink has not washed off so far. Thanks again for sharing! PS: Remember to give a little time for drying :).
I haven’t tried that but what a great tip! I will definitely keep it in mind for the future. Thanks for sharing for everyone!
-Julie
AFAICT you’ve coeverd all the bases with this answer!
Maybe this is a stupid question, but I’m looking into doing this. So do you print directly on the transparent paper, or print on normal paper and the adhesive sticks to it, which then transfers the image onto the adhesive?
Thanks for posting this. Have you ever tried to remove the labels? (In case you want to use the jar for something else?) If so, do they easily remove?
Pingback: DIYしなくてもできる収納アイデア33選!国内外のおしゃれ収納を真似よう! | folk
Pingback: Most Pinned And Best Diy Kitchen Ideas of 2014 1 | Diy & Home | Creative Projects For Your Home – Best Home Decorating Ideas
I love your webpages! I just wish there was a way to say, have kinko’s make the labels for me. Not to sound mean, I just foresee an afternoon of templates gone wrong & pages of special paper wasted while I yell at my kids to leave alone to finish this. But I do seriously love your projects & site.
Pingback: Brun House 無料ラベルでキッチンをおしゃカワに!23種類のラベル使い実用例♪
Pingback: 25 of the DIY kitchen decorating ideas
Does anyone know where to get more labels in the same format for let’s say pepper, garlic powder, thyme etc,.? Or is it just make your own with the font you mentioned
Thank you
Hi, I’m just curious where you determined the numbers from in the top right corner?
Thanks
Pingback: Fun, Easy, DIY Kitchen Projects and Ideas That Won’t Break the Bank – Top Reveal
Thanks for the damp paper towel trick. Came out great