Hers.
It’s time to get trashy in the kitchen, people. No, not as in “let’s decoupage the cabinets with faces of kittens.” I’m talking about the age old kitchen question of where to stash the trash.
On day 1 of move-in, we put a trash can on the end of the kitchen counter by the breakfast nook and there it stayed for the next three years. Not that we loved it being the first thing anyone saw when entering the kitchen, but we just had no idea where else to put it.

For a small family unit of 2, we go through a lot of trash, even after sorting recycling. There was the option of downgrading to a smaller can to put under the sink or in the pantry but I knew we’d never have a successful marriage because I’d be saying, “Chris, can you take out the trash” more often than “Honey, can you take care of dinner tonight?”… (which is already pretty common).
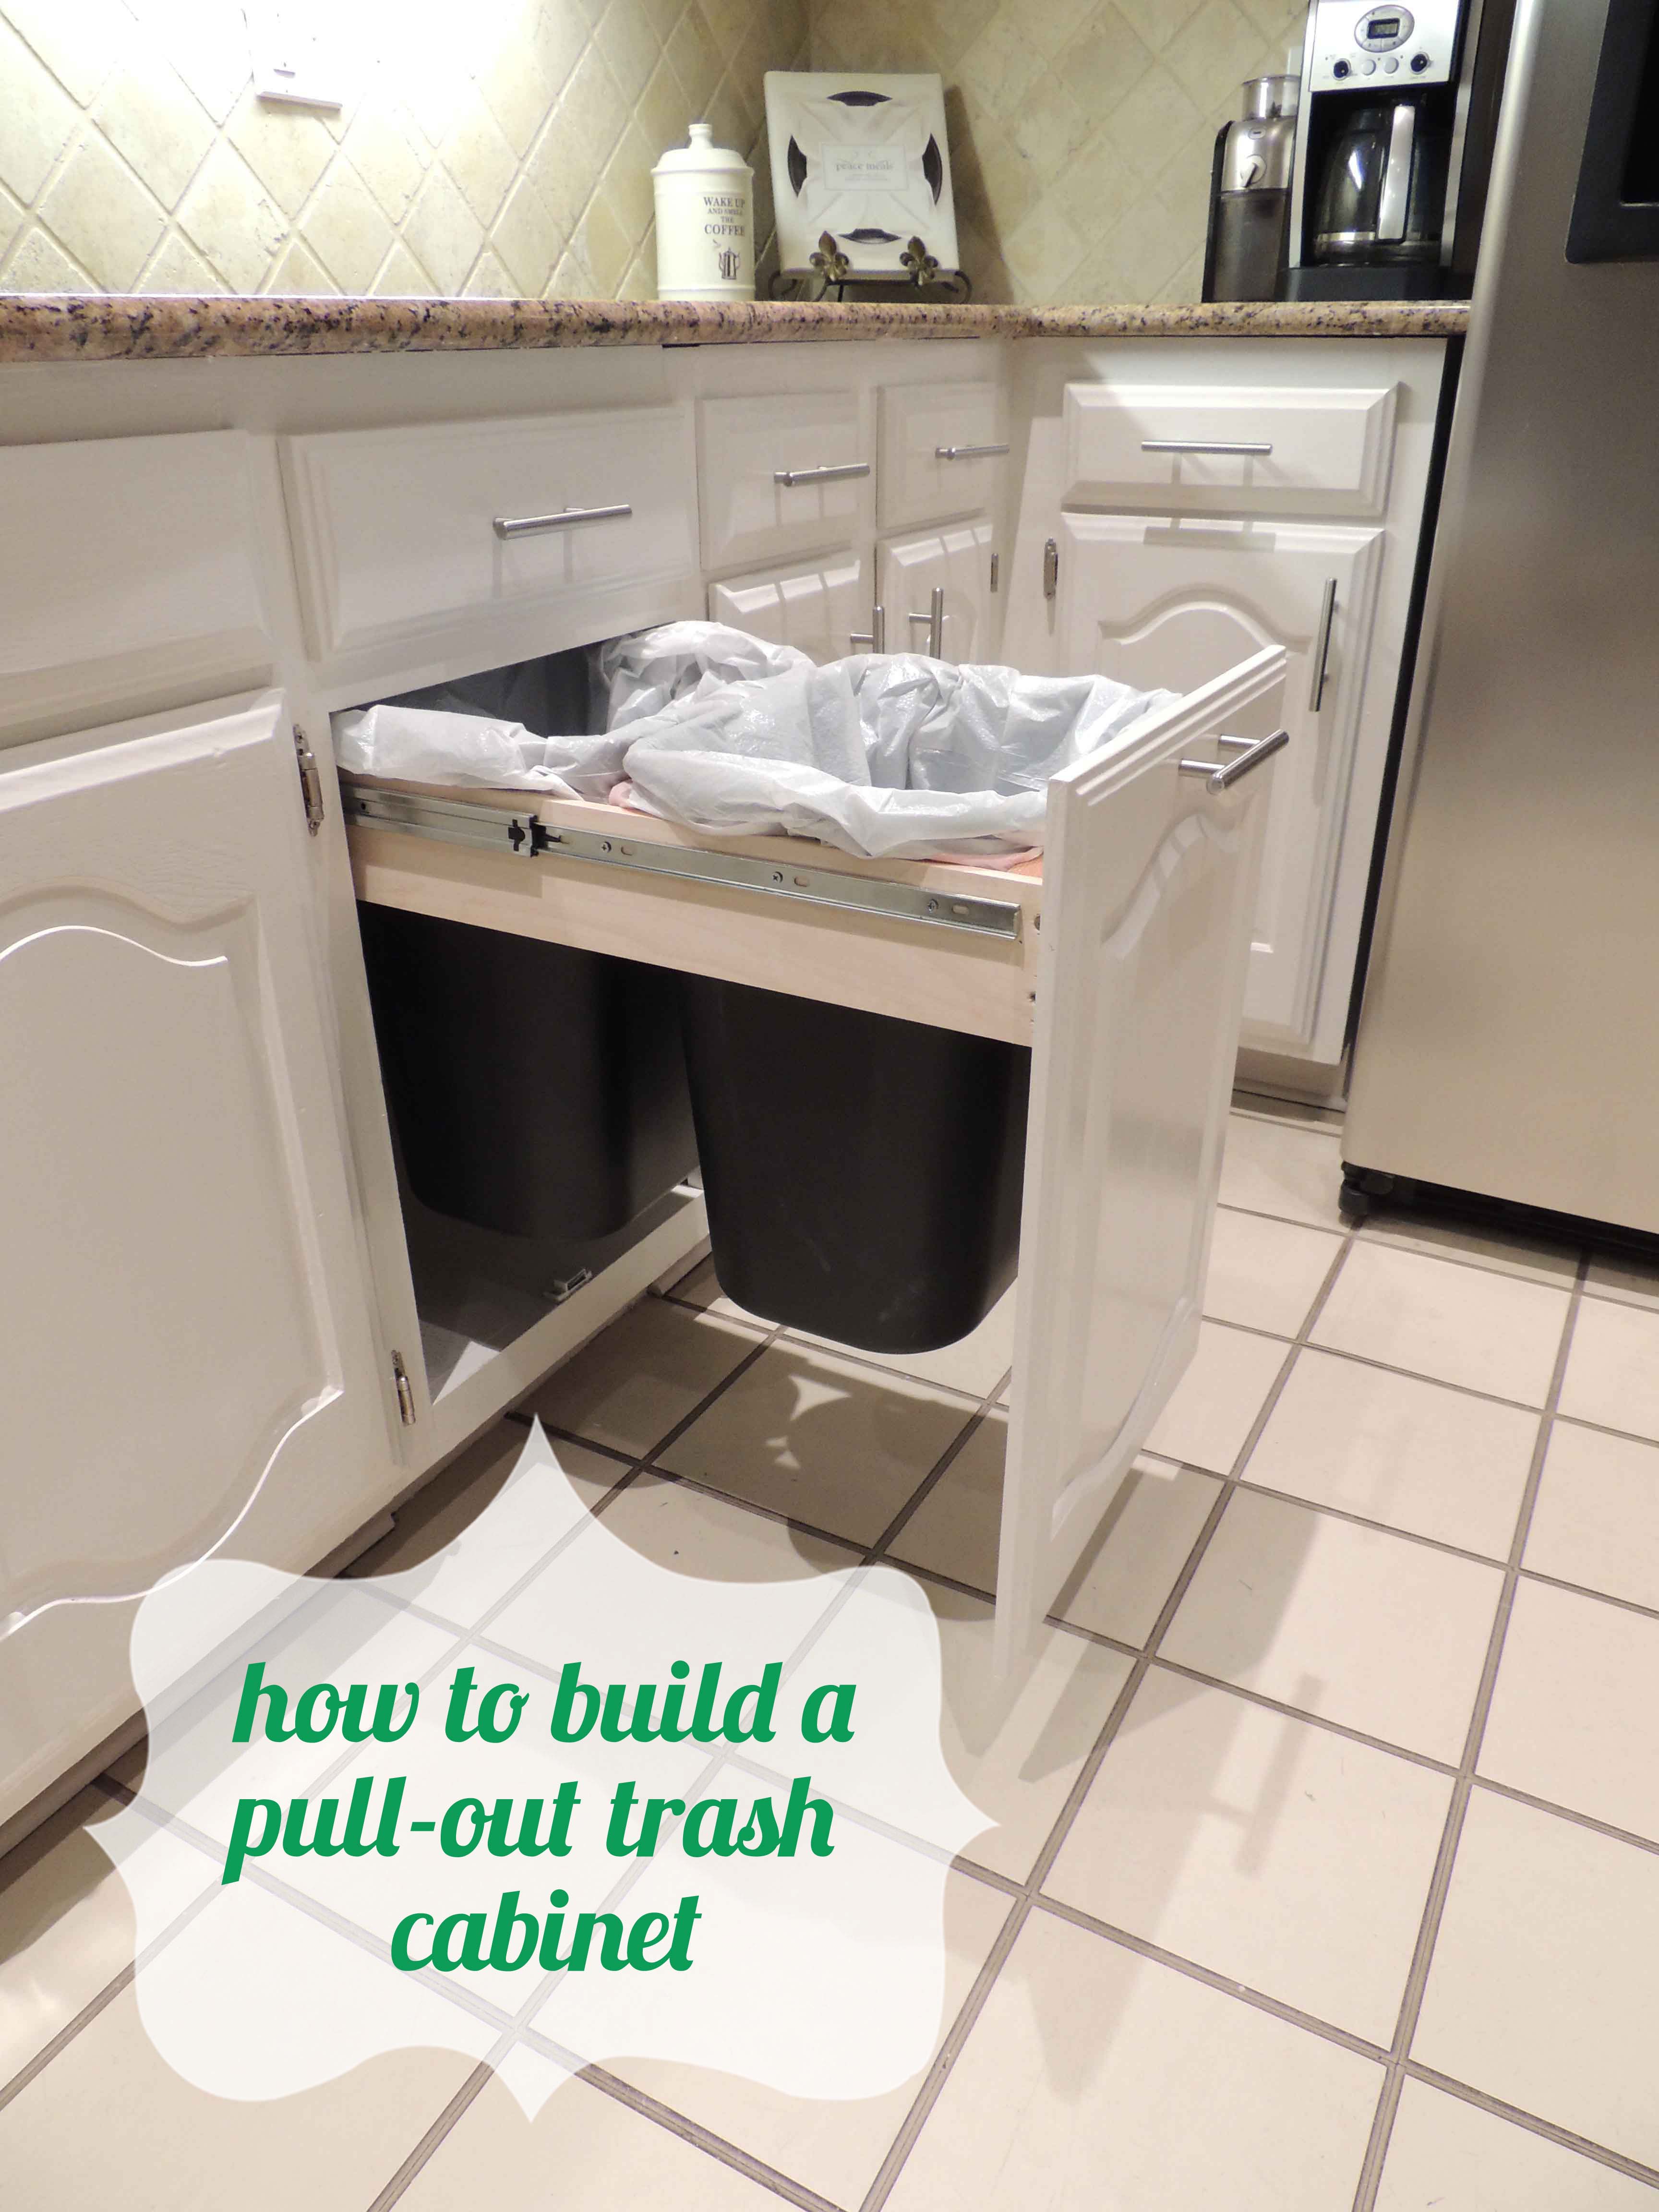
I found the perfect solution while perusing Pinterest the other day. Why yes- let’s just build a pull-out trash cabinet! I could find a medium-sized trash can and just tuck it away behind a cabinet door when I didn’t need it. Genius!

Source: Schrock
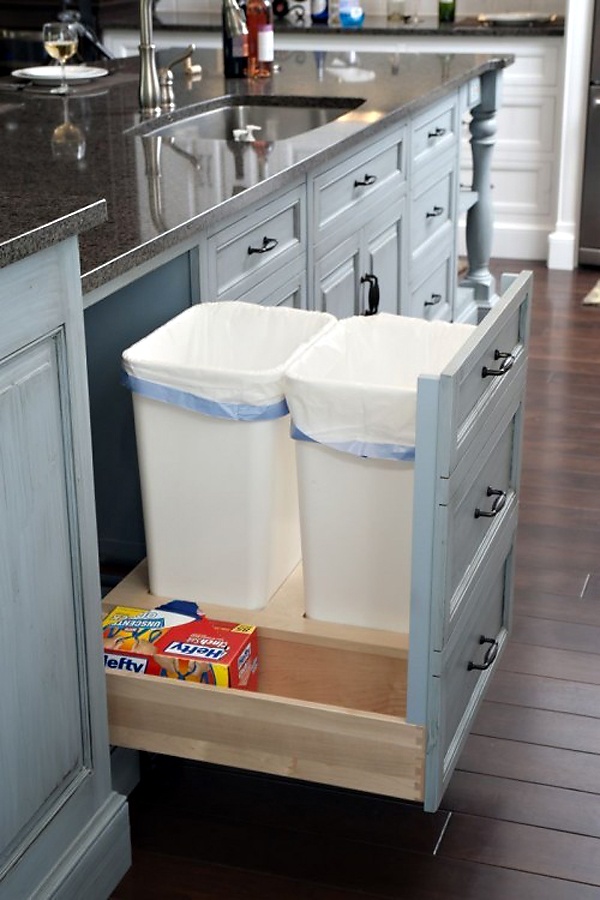
Source: Houzz
I even knew exactly which cabinet I could sacrifice for this purpose too.
![]()
This cabinet never had an interior shelf and was an odd size for normal kitchen storage but would be the perfect space for a hidden trash can!

I knew it was meant to be because we even had a pair of drawer slides leftover from our pantry project (catch up on the pantry project here).
We purchased the drawer slides for $5.99 each here (they’ve worked perfectly on the pantry since we installed them nearly 2 years ago, by the way. We highly recommend them as a super cost effective solution for pull-out shelving!).

With the solution in mind, I turned it over to the execution department (hm, maybe another term is in order so it doesn’t sound like I turn our projects over for beheading).
His.
Growing up, there was a constant battle between my parents about where to put the trash can: my dad wanted it in a convenient area in or around the kitchen, but my mom wanted it completely out of the house. Their compromise was to keep it in the laundry room, which was technically halfway between the kitchen and the back door. Somehow, though, the battle ensued once again after I moved out, and the trash is always in a different location every time I visit.
Fortunately, though, Julie and I never had such a conflict; we both tend to be a bit lazy, so keeping the trash anywhere outside of the kitchen was definitely not an option. There also wasn’t really anywhere in the kitchen to keep the trash can, so… out in the open it stayed. We did, however, put another trash can in the garage so that we could dispose of the “funkier” items so as not to stink up the house. This system worked quite well for about three years until one Saturday afternoon, the inevitable happened: Julie changed her mind, and now she wanted somewhere to hide the trash. Lucky me.
It turns out, though, that luck was actually on my side for this one, as Julie had already decided where she wanted it and I already had everything I’d need, which was really just some wood and some sliders, all of which I had leftover from previous projects.
The first step was to get the sliders mounted inside the cabinet. I cut some strips out of plywood (I needed thin wood) and screwed it to the inside walls.

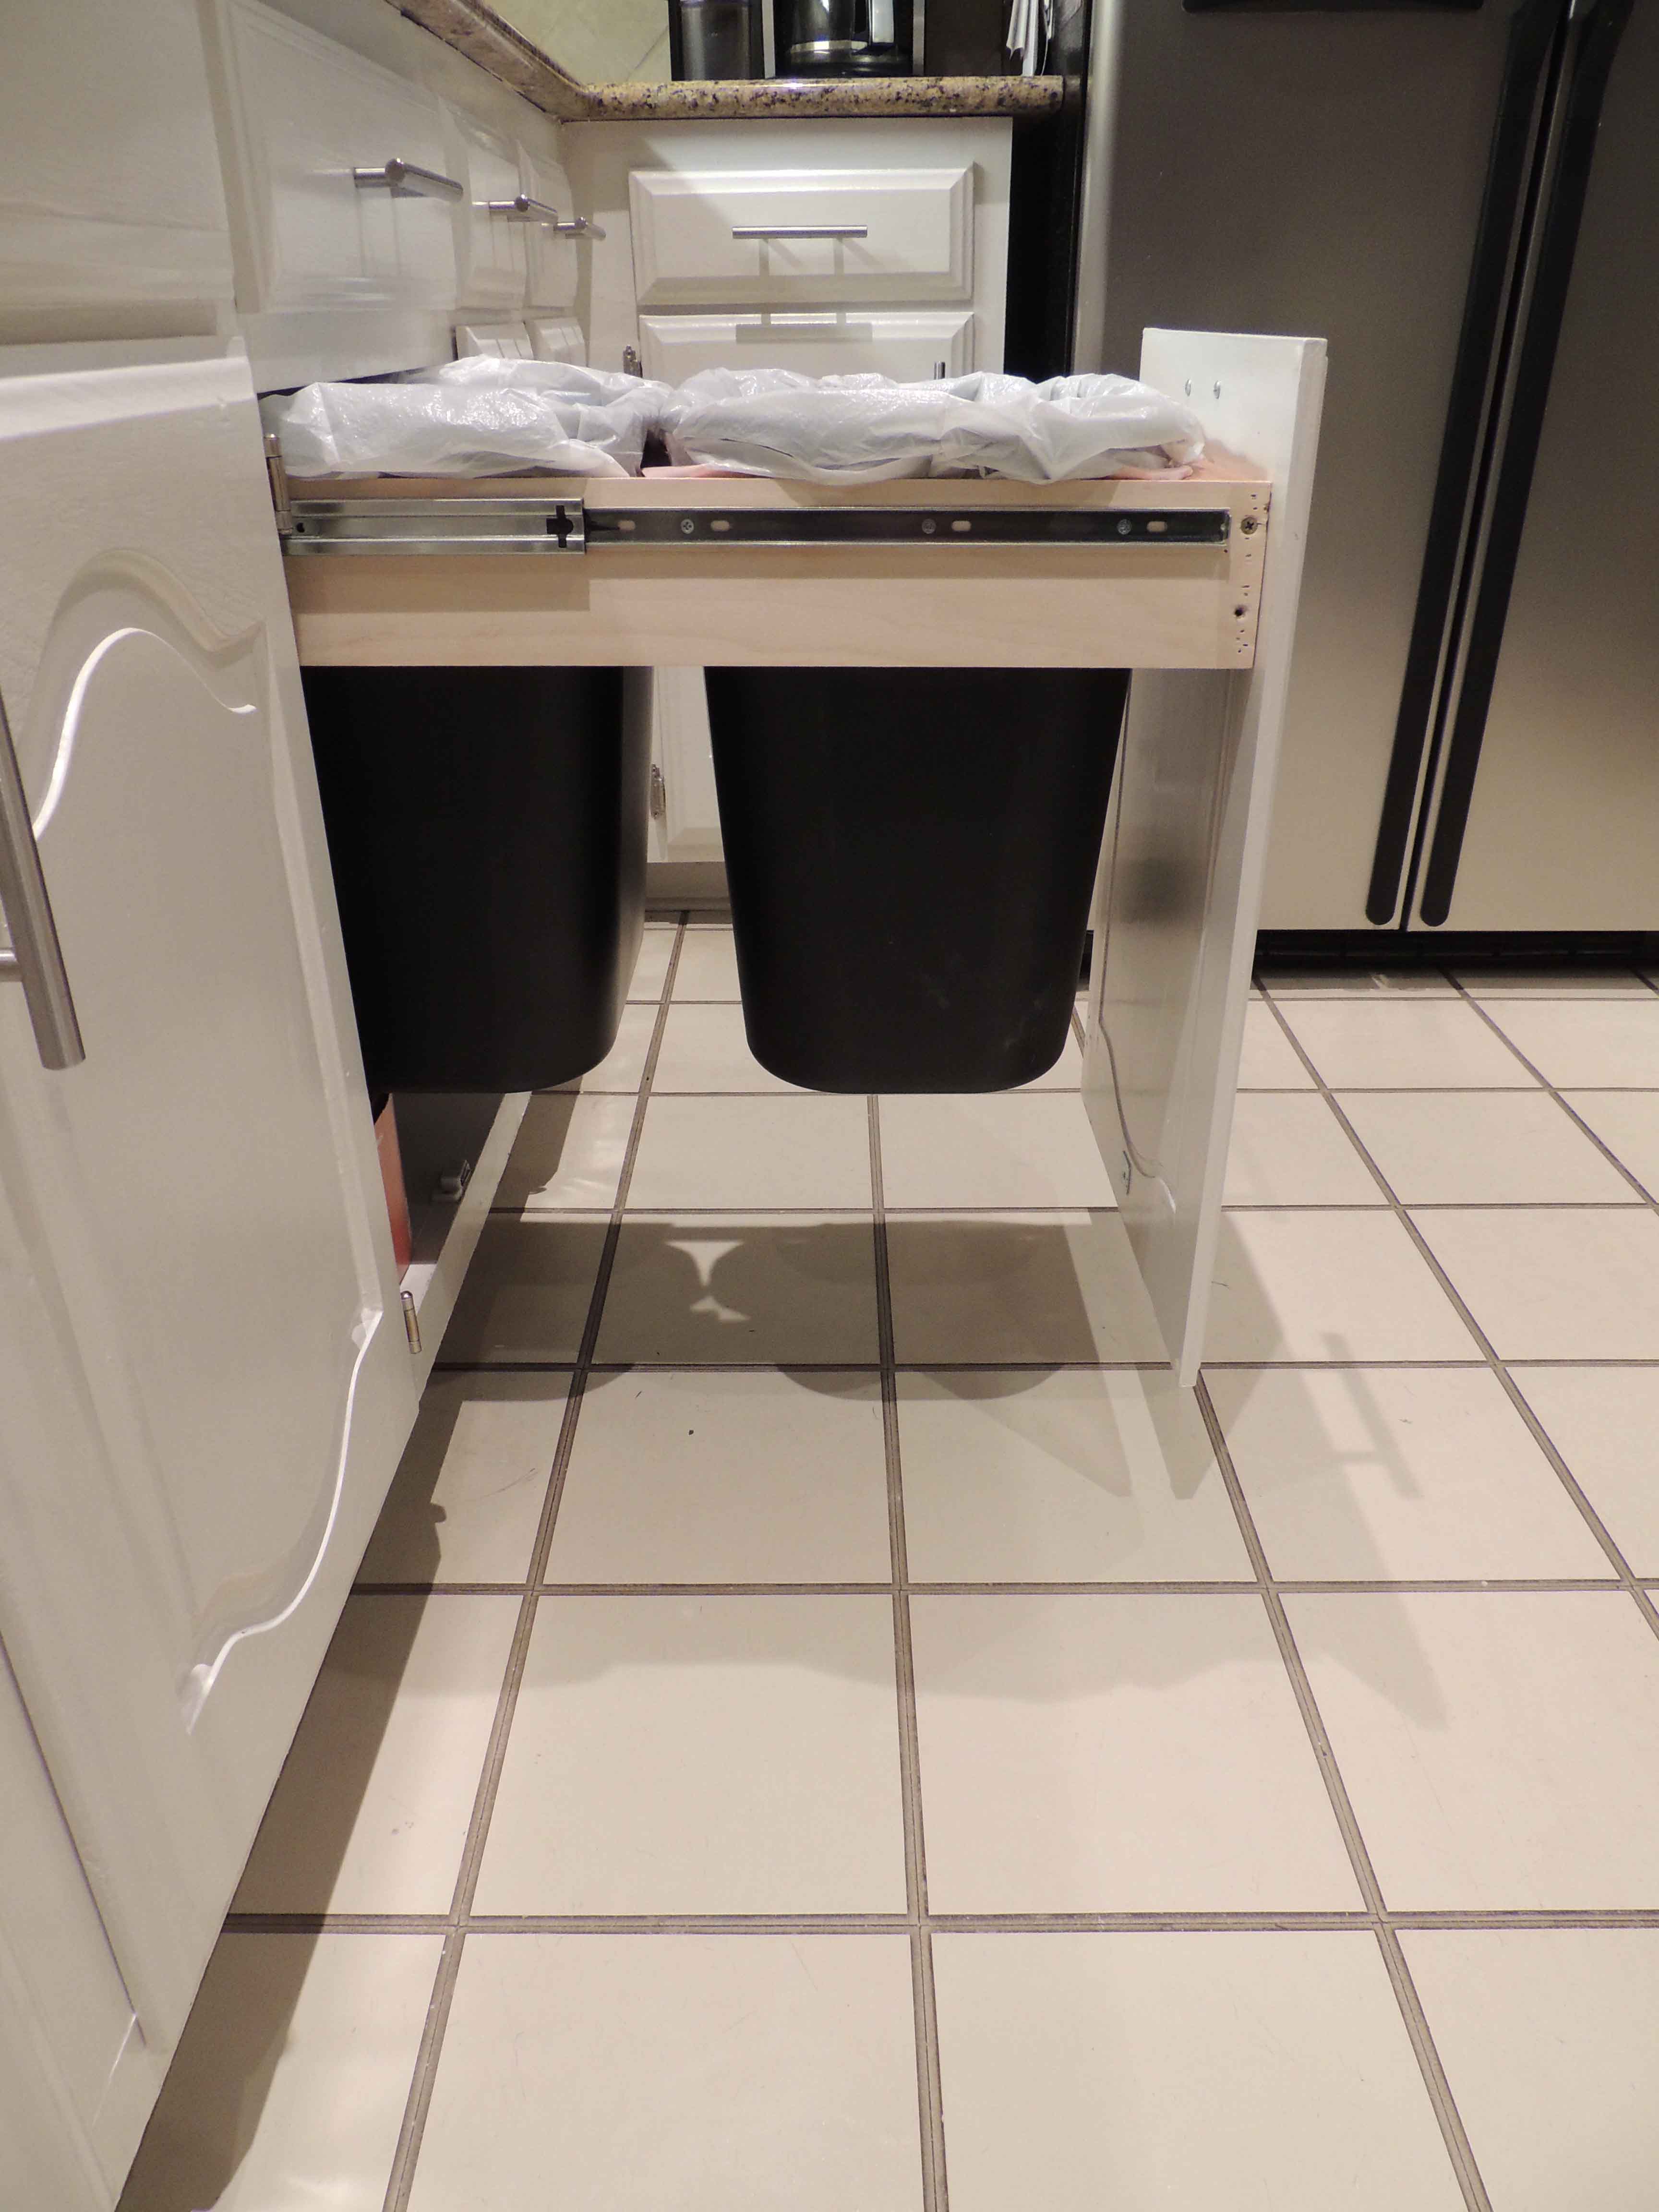
Next, I mounted the sliders to the wood, making sure the two sides were level and even with each other:

Next, I cut down some 1/2 x 4 wood pieces and mounted the inner slide piece to them:


Initially I tried spacing everything out and making a box so I’d have a cross piece to mount to, but it turned out to be a huge pain to get the widths right, so I gave up and removed the front and back piece, and just mounted the cabinet door directly onto the sliding wood pieces.

Once everything was done, we had an issue of the door slowly sliding open when it began to become weighed down with trash, so I needed some sort of latch that was easy to open but also stayed out of sight. My solution was a magnetic catch, which was just a metal tab mounted to the door that would stick to a magnet mounted inside the cabinet:


Next, I reused the original cabinet pull and just lined it up with the drawer pull above it:

Then I had to patch and paint the holes from the old pull location and nail gun:


Boom. Trash cabinet.
Materials Needed:
- Drawer slides, $5.99 from eBay
- 1/4″ Plywood – 2 strips, already had on-hand
- 1/2″ x 4″ Lumber – 2 pieces, already had on-hand
- Magnetic catch, $1.28 from Home Depot
Price: Since we already had the wood leftover from previous projects, this came out to a grand total of $7.27. Not too bad for some trash.
After.

Now you see it.

Now you don’t!