Hers.
One of the items far, far down on our to-do list involved getting a new mailbox. Not only was it a little crooked, rusty, and ugly but it took the brute force of Hercules to open.
After a year-and-a-half of tug-of-war with the mailbox, we finally gave in and bought a new one. Just a standard, black, run-of-the-mill one from Lowe’s for just under $18.
Not too shabby, but also a little lot on the plain side. So, I turned to the never-ending idea generator (um, hello, Pinterest) for inspiration. I soon stumbled upon this cute idea for displaying house numbers on a door. You know what else this would look great on? A mailbox!
Yes, vinyl characters were just the solution! This pin led back to an Etsy seller, Single Story, who made a variety of different vinyl designs. Check out her store here: Single Story. I messaged her with my idea hoping she’d be open to a custom design as I had measured the mailbox to determine the exact size the numbers could be. A few hours later, she messaged me that she was game and we were off!
Here is the design I came up with, similar to the one I found on Pinterest but I like the font (called Engravers) a little better.
If you’d like to duplicate this for your own purposes, feel free to download the Photoshop template here.
In about a week, I received the custom vinyl characters in the mail. The seller at Short Story was so wonderful to work with- she even provided detailed instructions in the packaging.
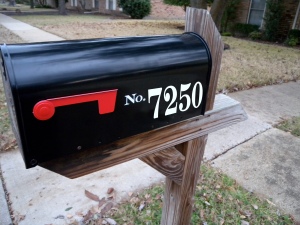
It only took about 10 minutes to apply the vinyls. We purchased two sets so we could apply to each side of the mailbox. Our original mailbox only had the numbers on one side, which never made sense to me, since traffic can approach our house from either direction.
This is such a quick and easy way to jazz up your mailbox!
His.
One of the first “projects” I ever did after moving in was actually to fix the mailbox- it was poorly mounted, crooked, missing fasteners, and so bent up it barely opened. I fixed it the same way a cut-rate body shop might fix your car: I hammered it back into a shape that would allow the door to close if slammed hard enough, forced it to be level by putting screws where there’s really not a place for any, and used whatever bolts I had lying around from previous projects to keep it all mounted. This seemed to work for the time being, but the grimace on our Lebron James look-a-like mailman’s face made it obvious that this would eventually need to be resolved.
Anyway, fast-forward to a few months ago in the hardware store, where while I’m carefully selecting lumber for the project to be revealed in our next post, Julie wandered off. She soon called me and told me to come help her pick out a mailbox. Oh, great. I obliged but really didn’t have time to mess with it, so it ended up just rattling around in my backseat for a few months.
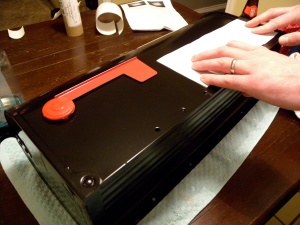
Eventually I grew tired of hearing a mailbox clank every time I turned left, so I decided it was time to install it. Julie ordered some vinyl letters and I was tasked with their application. I’ve worked in the automotive industry for a few years, so applying stickers isn’t a foreign concept, and I’ve learned a few tricks:
1. Clean, clean, clean- If there’s any dirt or oil on your surface, your letters won’t adhere properly. I used window cleaner and a wash cloth to make sure I had a clean surface.

2. Apply slowly- Make sure you have everything lined up and even, and start with the easiest point at which to ensure proper placement. For this, I kept even spacing between the bottoms of the numbers and the bottom of the mailbox to ensure everything came out straight.
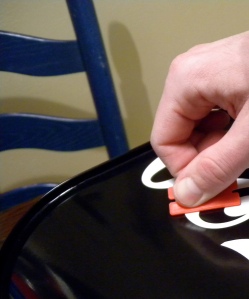
3. Peel level- The numbers themselves are adhesive, but come on an adhesive backing as well, This backing has to be peeled off after application, so I actually flip the edge over 180* so I can almost “roll” the backing off.
4. Air pockets- The vinyl will have little air bubbles, so make sure you smooth them out. I used a small plastic razor blade which had a nice edge but wouldn’t scratch the paint on the mailbox.
5. Heat- I used Julie’s fancy orange hair dryer to add style and promote adhesion.
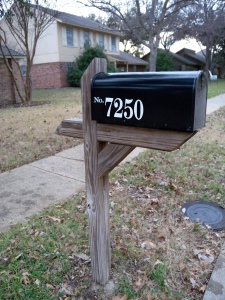
I finally got the numbers applied and got the mailbox installed. It actually looks pretty good- it definitely beats the cheap reflective numbers it had previously, and I like having numbers on both sides. Oh, and I don’t need a winch to get the mail anymore.

After.


